

Everything below is for the web app on a computer, signed in as a Content Manager.
Table of contents
- Step 1 — Open the trainings
- Step 2 — Create a training: Basic Info
- Step 3 — Build the course content
- Step 4 — Write a lesson
- Step 5 — Review and publish
- Step 6 — Export and import
- Good to know
Step 1 — Open the trainings
Click Trainings in the sidebar.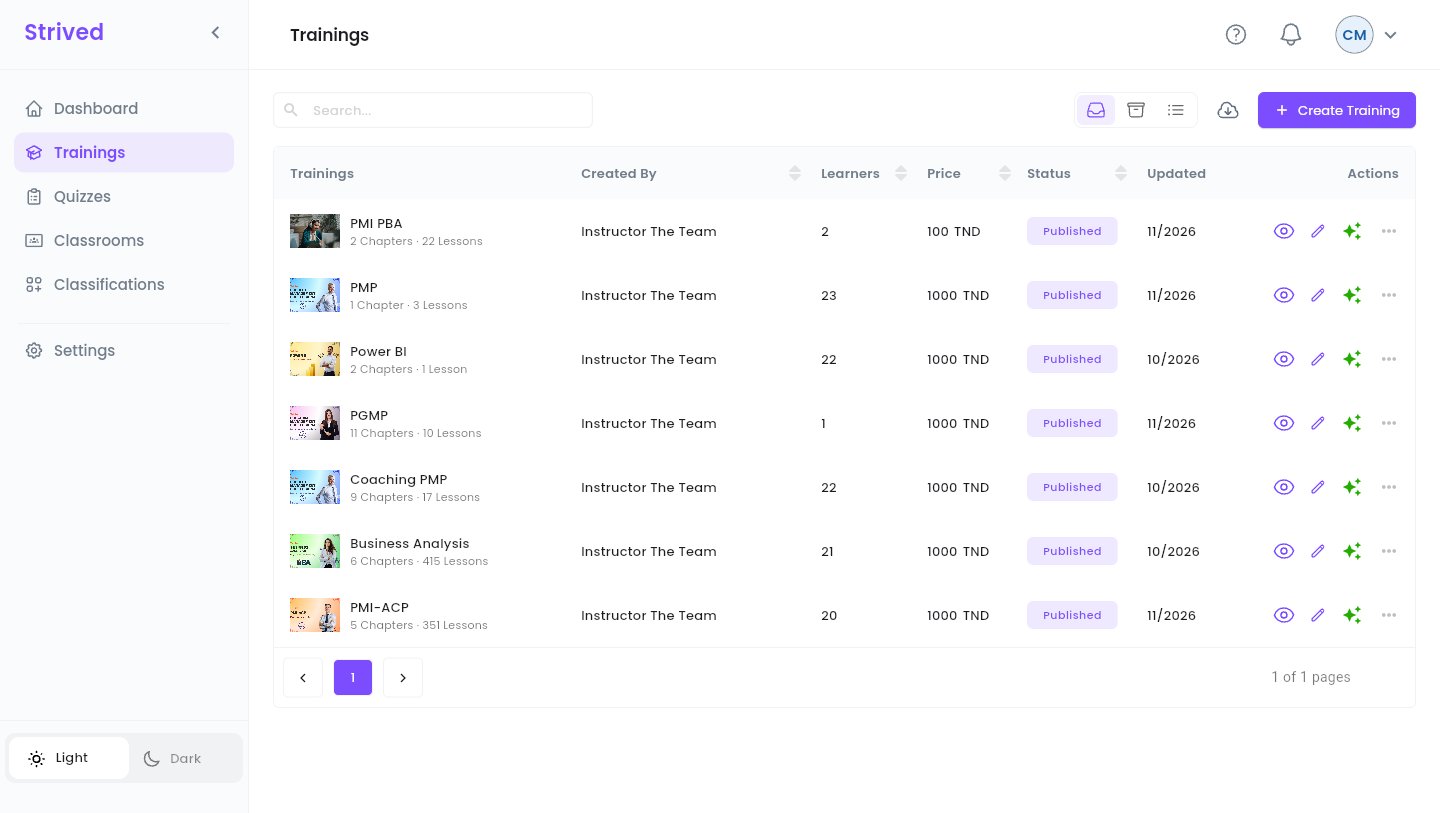
Trainings.
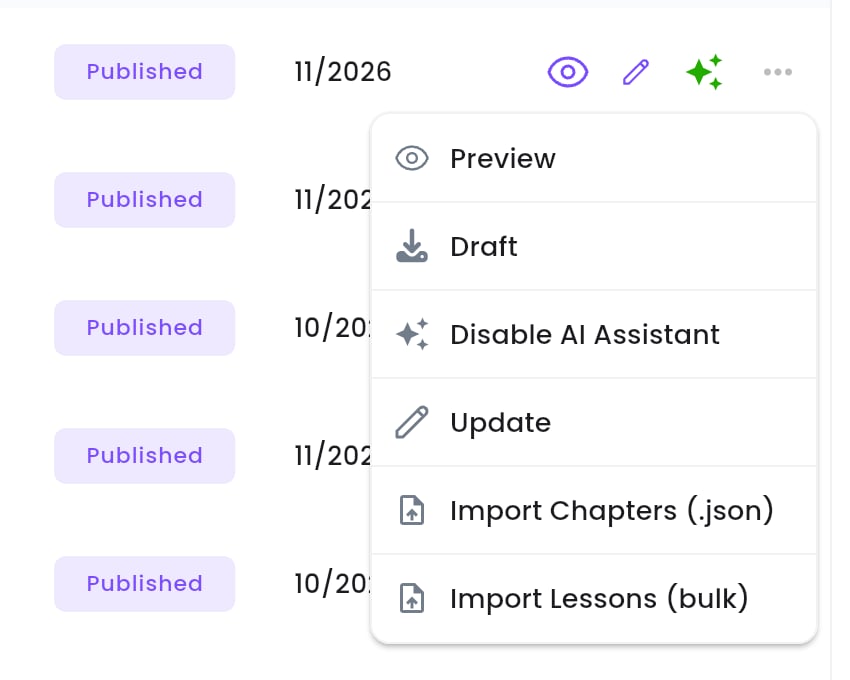
The ⋯ menu of a training.
The Active / Archived / All records icons at the top right filter the list. Archiving
itself is done by an admin.
Step 2 — Create a training: Basic Info
Click Create Training at the top right. The editor has two steps: 1 Basic Info and 2 Course Content.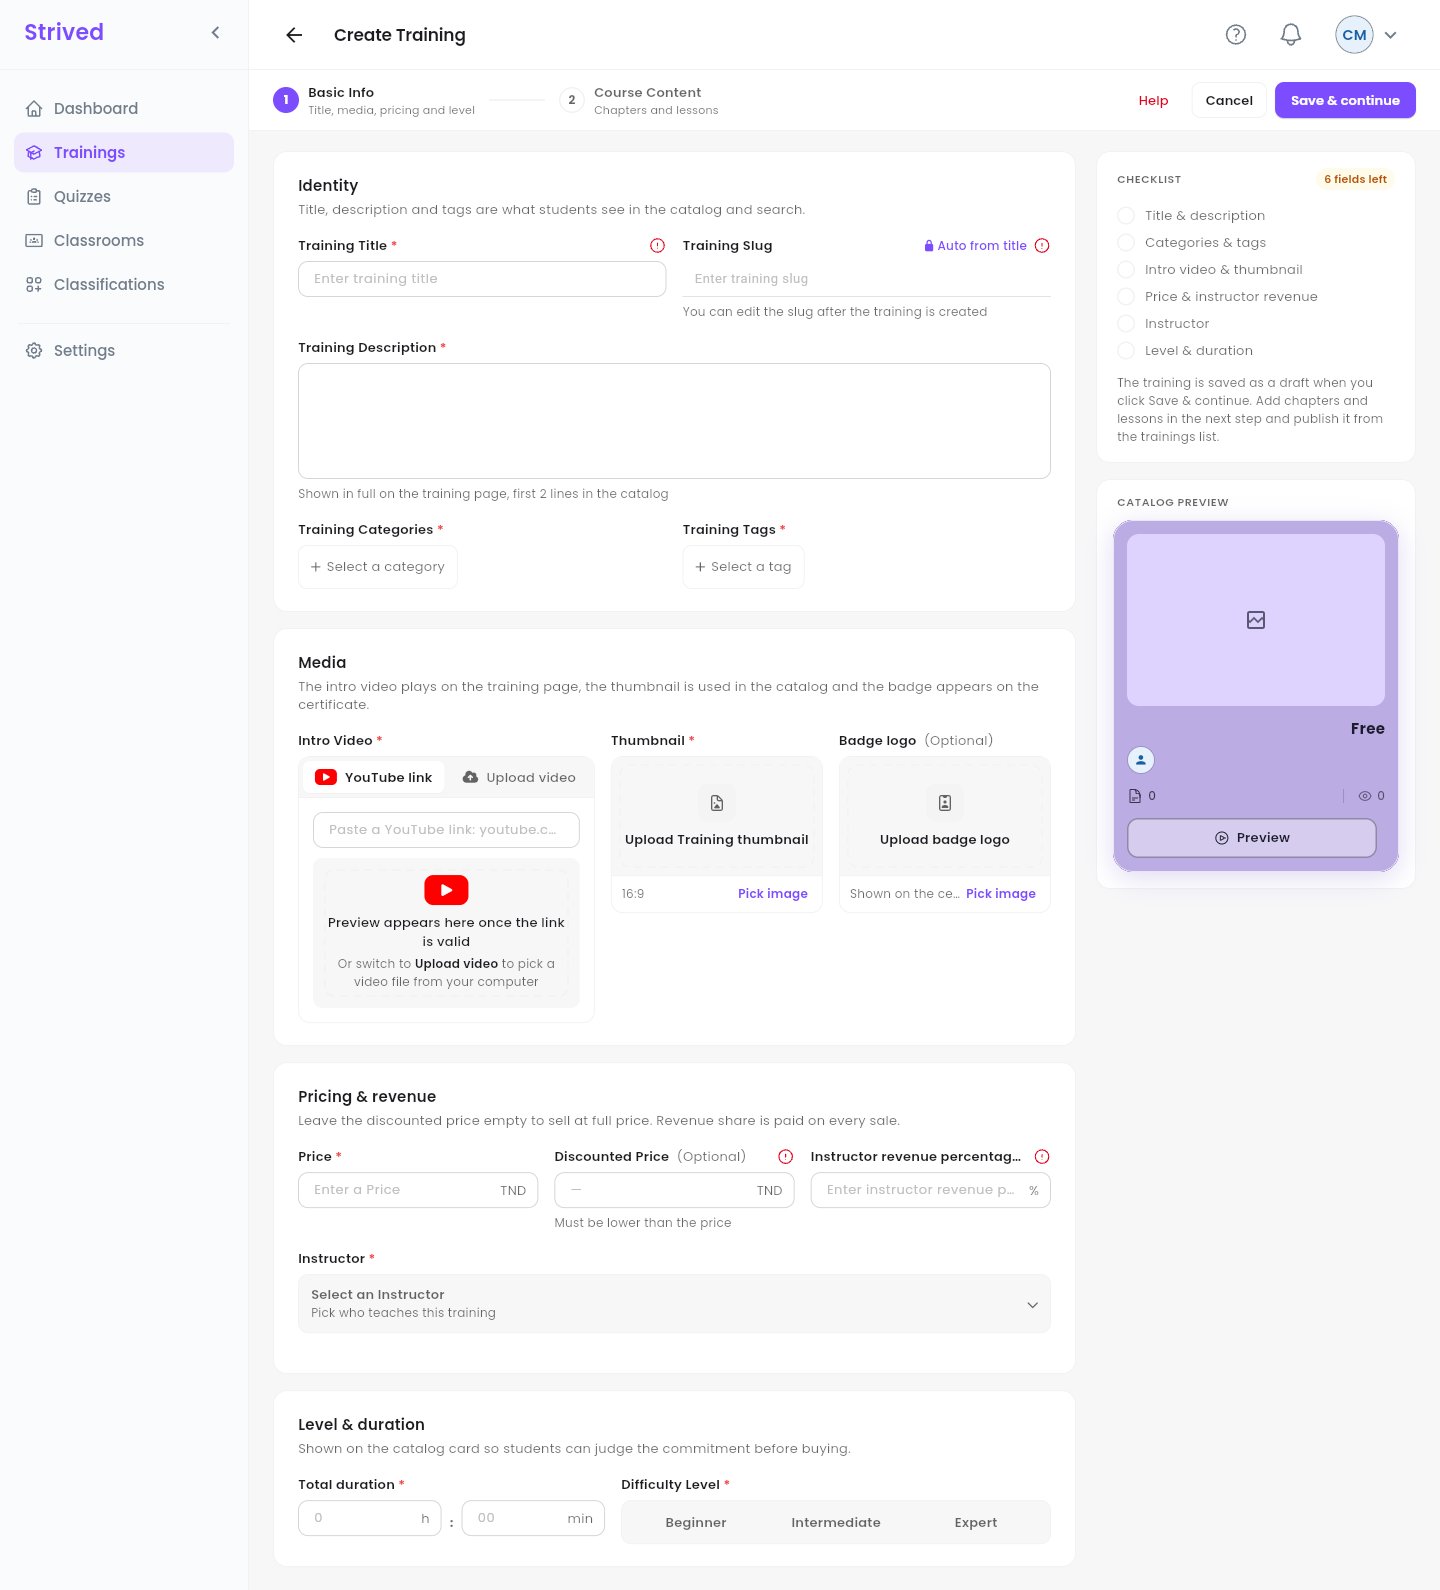
Create Training → Basic Info.
1
Identity
Training Title, Training Description, Training Categories and Training Tags. The
Training Slug is filled Auto from title.
2
Media
Intro Video (a YouTube link or Upload video), the 16:9 Thumbnail, and an
optional Badge logo shown on the learners’ certificate.
3
Pricing & revenue
Price, optional Discounted Price (lower than the price), and the Instructor revenue
percentage: the instructor’s share of each sale.
4
Instructor
Select an Instructor: the person who teaches the training. If the editor refuses with
“Missing Revenue for Selected Instructor”, an admin must first set that instructor’s revenue
percentage.
5
Level & duration
Total duration and Difficulty Level (Beginner, Intermediate or Expert).
6
Save & continue
The training is saved as a draft and the Course Content step opens.
Step 3 — Build the course content
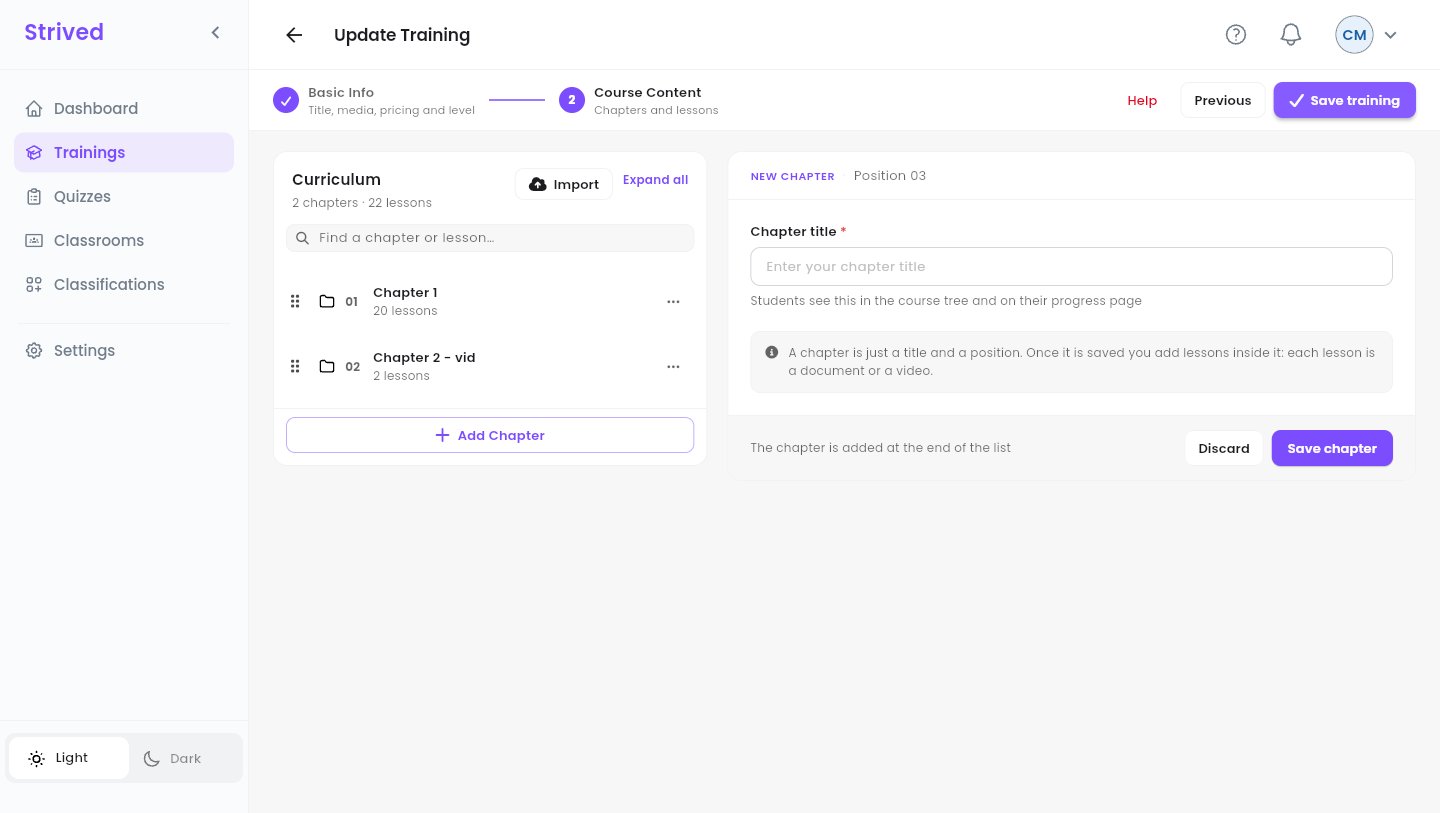
Course Content.
1
Add a chapter
Add Chapter, type the Chapter title, then Save chapter.
2
Add lessons
The chapter’s ⋯ menu offers Add Lesson, Rename chapter and Delete chapter.
3
Reorder
Drag chapters and lessons by their handle (the six dots).
4
Save the training
Click Save training at the top right.
Step 4 — Write a lesson
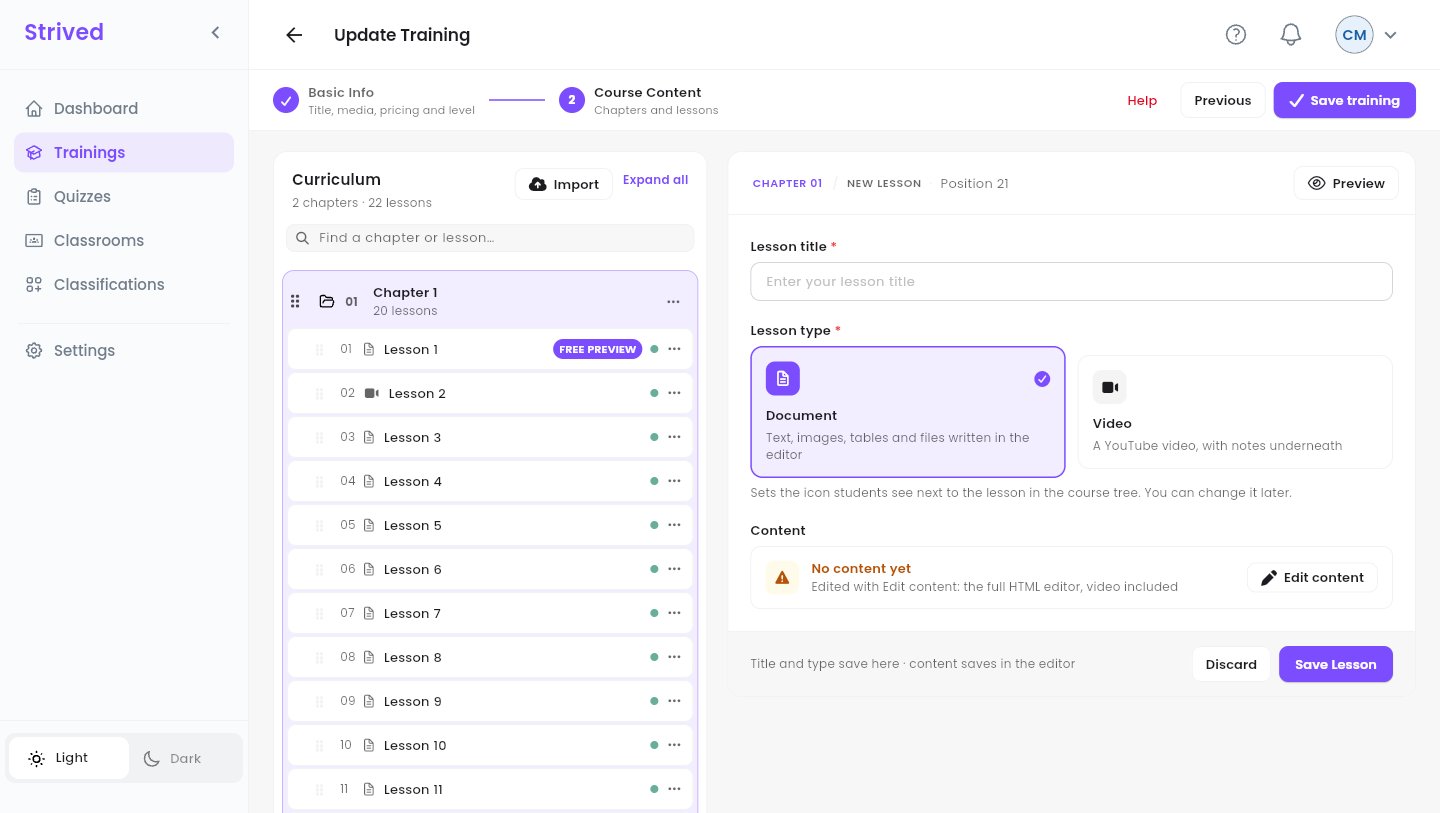
A new lesson.
Step 5 — Review and publish
Before publishing, open the training with the eye (Preview) and check it as a learner would: title, video, price, what This training includes, and the lessons.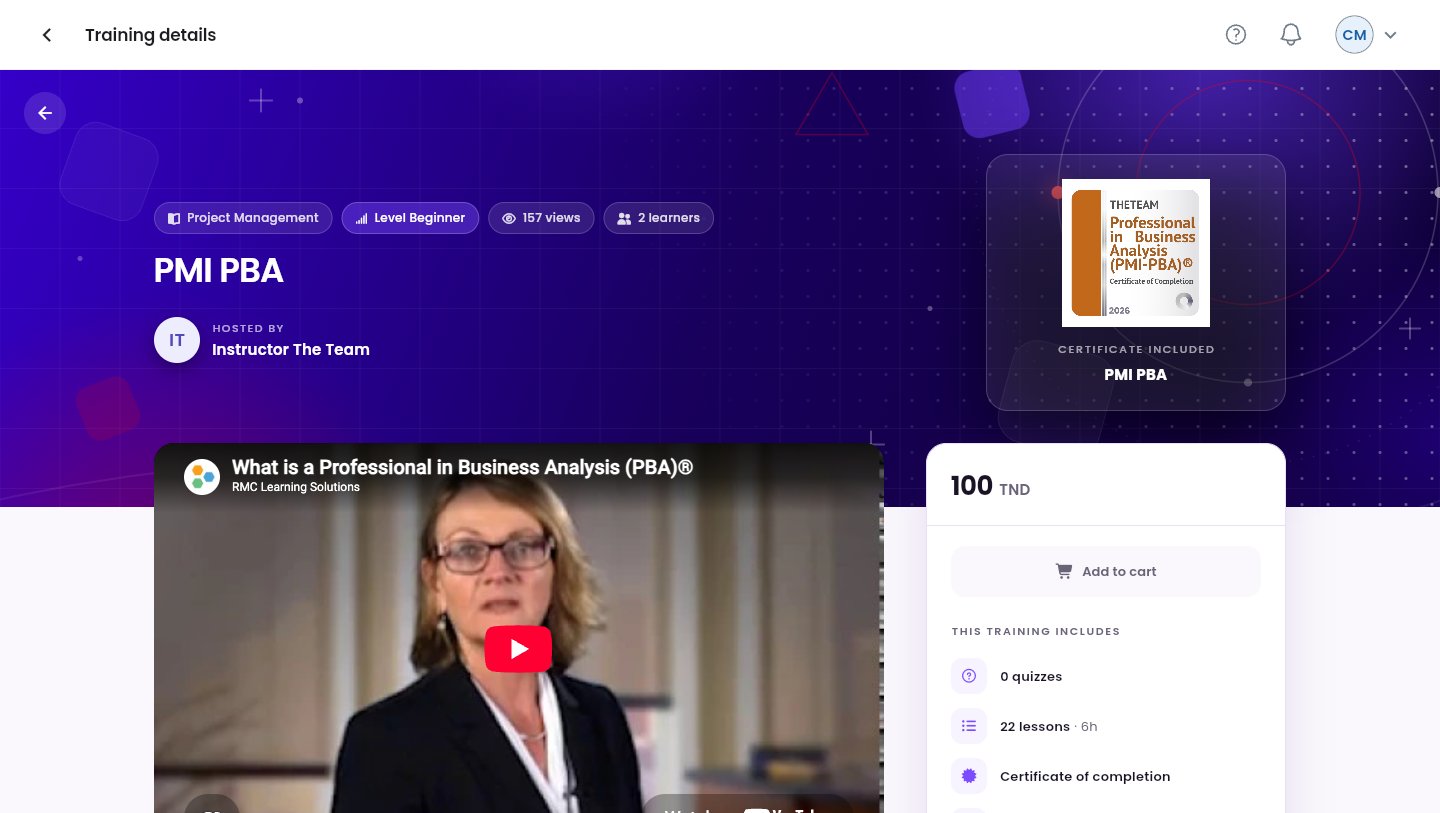
Previewing a training.
Step 6 — Export and import
- Export: the cloud icon next to Create Training downloads a backup of a training you pick,
as
<training>_backup.zip. - Import Chapters (.json): adds chapters from JSON files, such as another training’s export.
- Import Lessons (bulk): turns images into lessons, one image per lesson, in file-name order
(
01-…,02-…).
Good to know
An instructor finished a training: what do I do?
An instructor finished a training: what do I do?
Find it in Trainings (status Draft), review it with Preview, fix what needs fixing
with Update, then ⋯ → Publish.
Can I give a training to a learner, or notify its learners?
Can I give a training to a learner, or notify its learners?
No, those actions belong to admins and instructors. Ask an admin.