Everything below is for the web app on a computer, signed in as an Admin. To message only
the learners of one training or one classroom, the bell on its row is quicker — see
Manage trainings and
Classrooms and chatrooms.
Table of contents
- Step 1 — Write the message
- Step 2 — Choose the type
- Step 3 — Choose the recipients
- Step 4 — Options: e-mail and scheduling
- Step 5 — Check and send
- Step 6 — Read the log
- Good to know
Step 1 — Write the message
Click Notifications in the sidebar.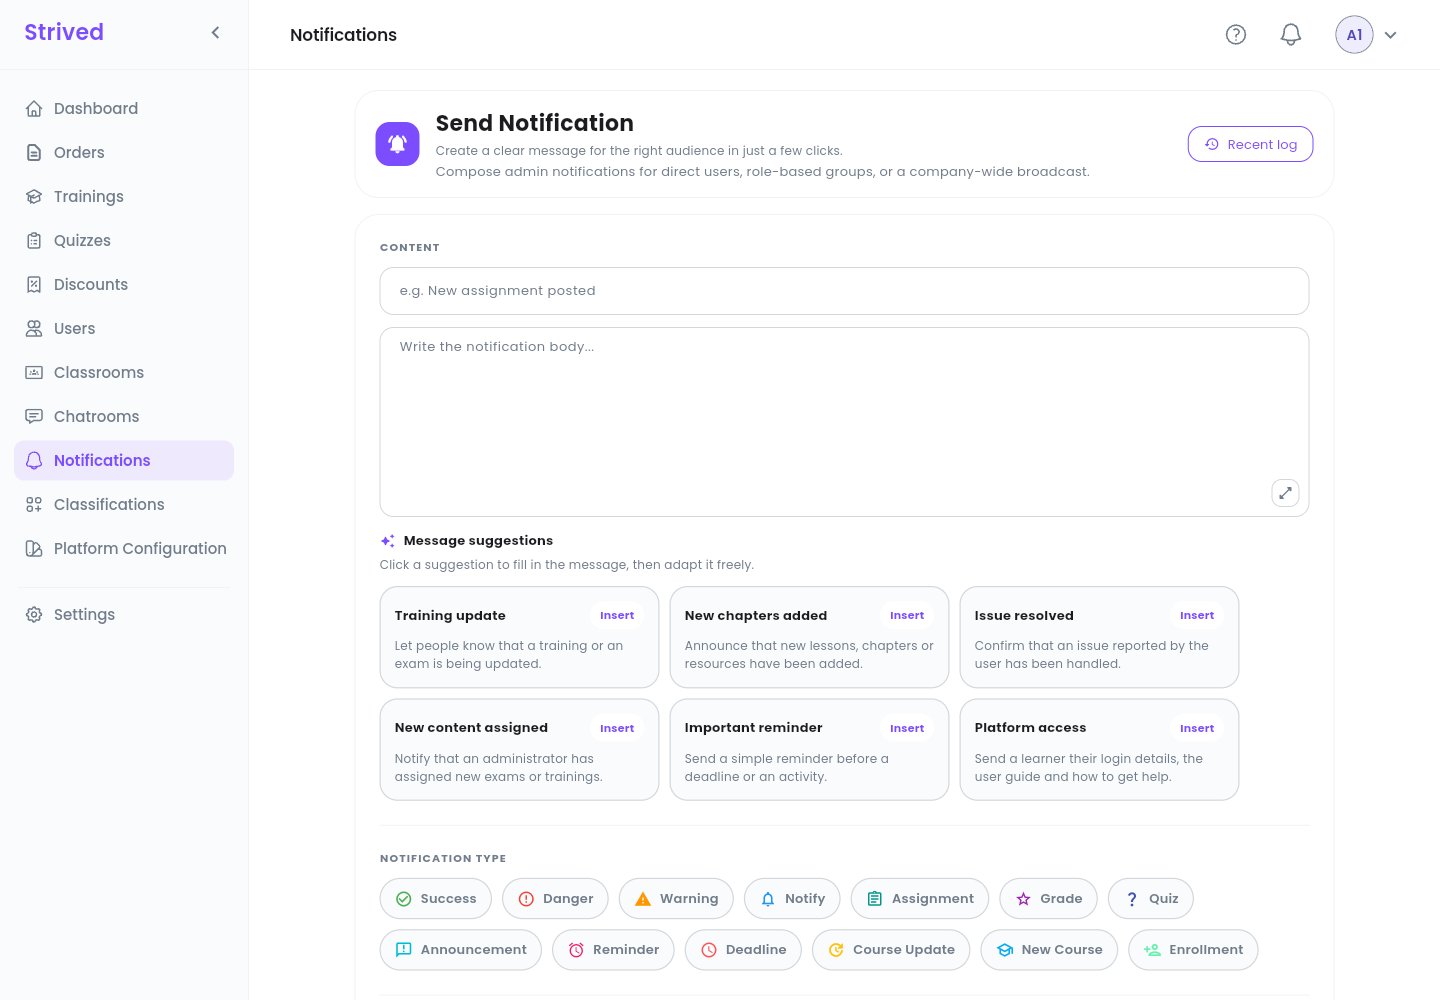
Send Notification: content, suggestions and type.
Step 2 — Choose the type
Under Notification Type, pick the one that fits: Success, Danger, Warning, Notify, Assignment, Grade, Quiz, Announcement, Reminder, Deadline, Course Update, New Course or Enrollment. The type sets the icon and color the recipients see. Company Context shows your company. It is locked to the company you administer.Step 3 — Choose the recipients
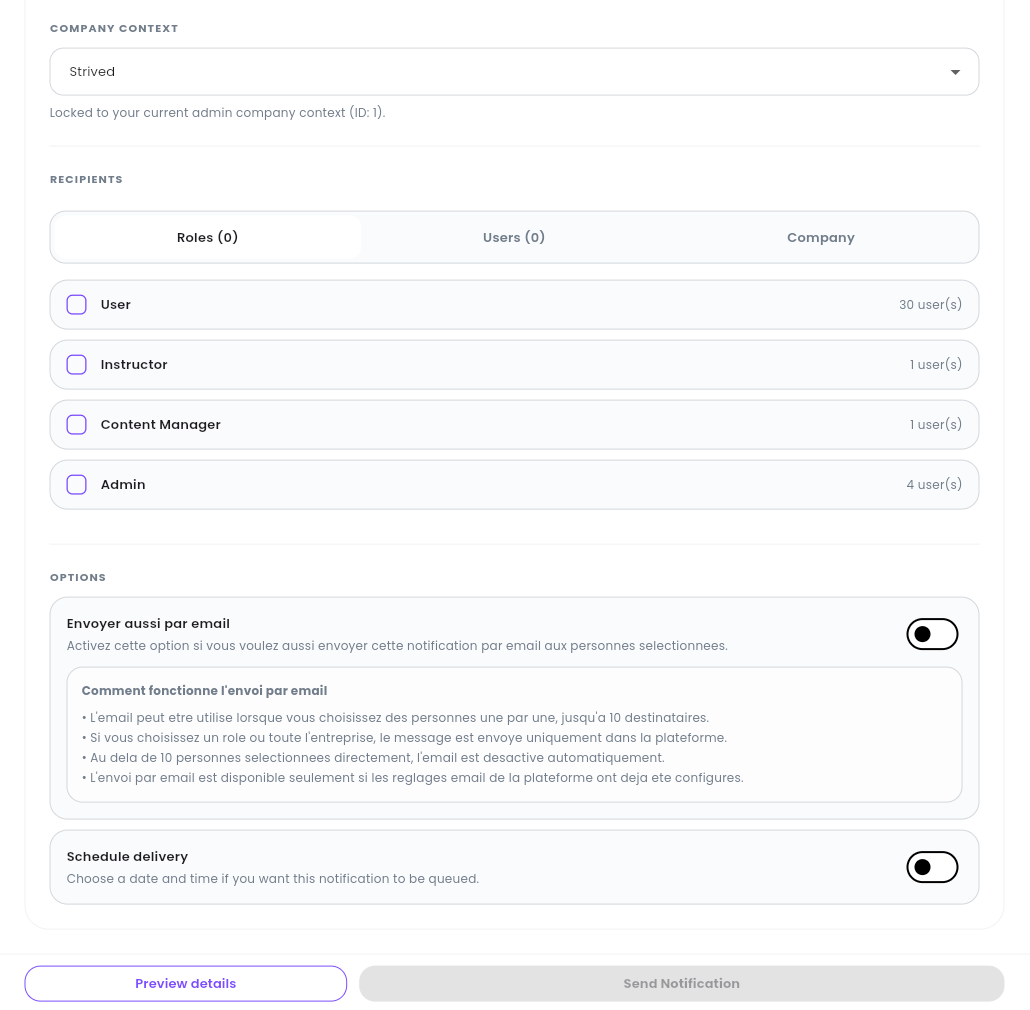
Recipients and options.
The number in brackets on each tab counts what you have selected.
Step 4 — Options: e-mail and scheduling
Two switches under Options:- Send by e-mail too (the switch at the top of Options): the recipients also get the notification by e-mail. This only works when you pick people one by one in Users, up to 10 recipients, and when the platform’s e-mail settings are configured. With a role or the whole company, the message stays in the app.
- Schedule delivery: choose a date and time, and the notification waits in a queue until then.
For now the e-mail option is written in French in the app (“Envoyer aussi par email”, with the
explanation “Comment fonctionne l’envoi par email”). It works the same way as described above.
Step 5 — Check and send
Click Preview details at the bottom to check the message and its recipients, then Send Notification. The button stays grey until the message and the recipients are filled in.Step 6 — Read the log
Click Recent log at the top right.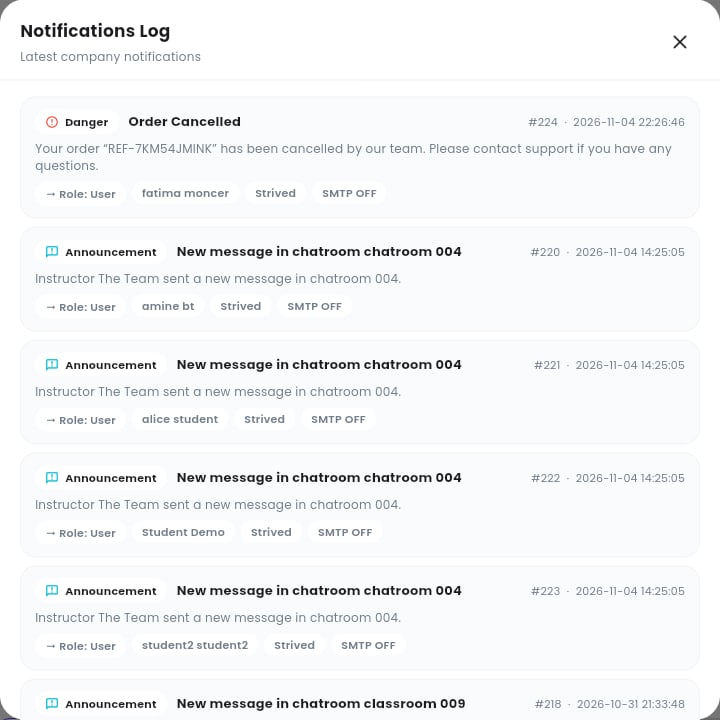
The Notifications Log.
Good to know
Where do recipients see the notification?
Where do recipients see the notification?
In the bell of the top bar; View All opens their full list of notifications.
Can I write to a single learner?
Can I write to a single learner?
Yes: open the Users tab and pick only that person. You can then also send it by e-mail.
Why is the e-mail switch disabled?
Why is the e-mail switch disabled?
You selected a role, the whole company, or more than 10 people. E-mail only goes to people picked
one by one in Users, 10 at most.