

Everything below is for the web app on a computer. The screenshots show the profile of the
test instructor account.
Table of contents
- Step 1 — Look at your profile
- Step 2 — Edit your details, bio and skills
- Step 3 — Add your education and work experience
- Step 4 — Add your certificates and their badges
- Step 5 — Share your profile
- Good to know
Step 1 — Look at your profile
Click Profile in the sidebar.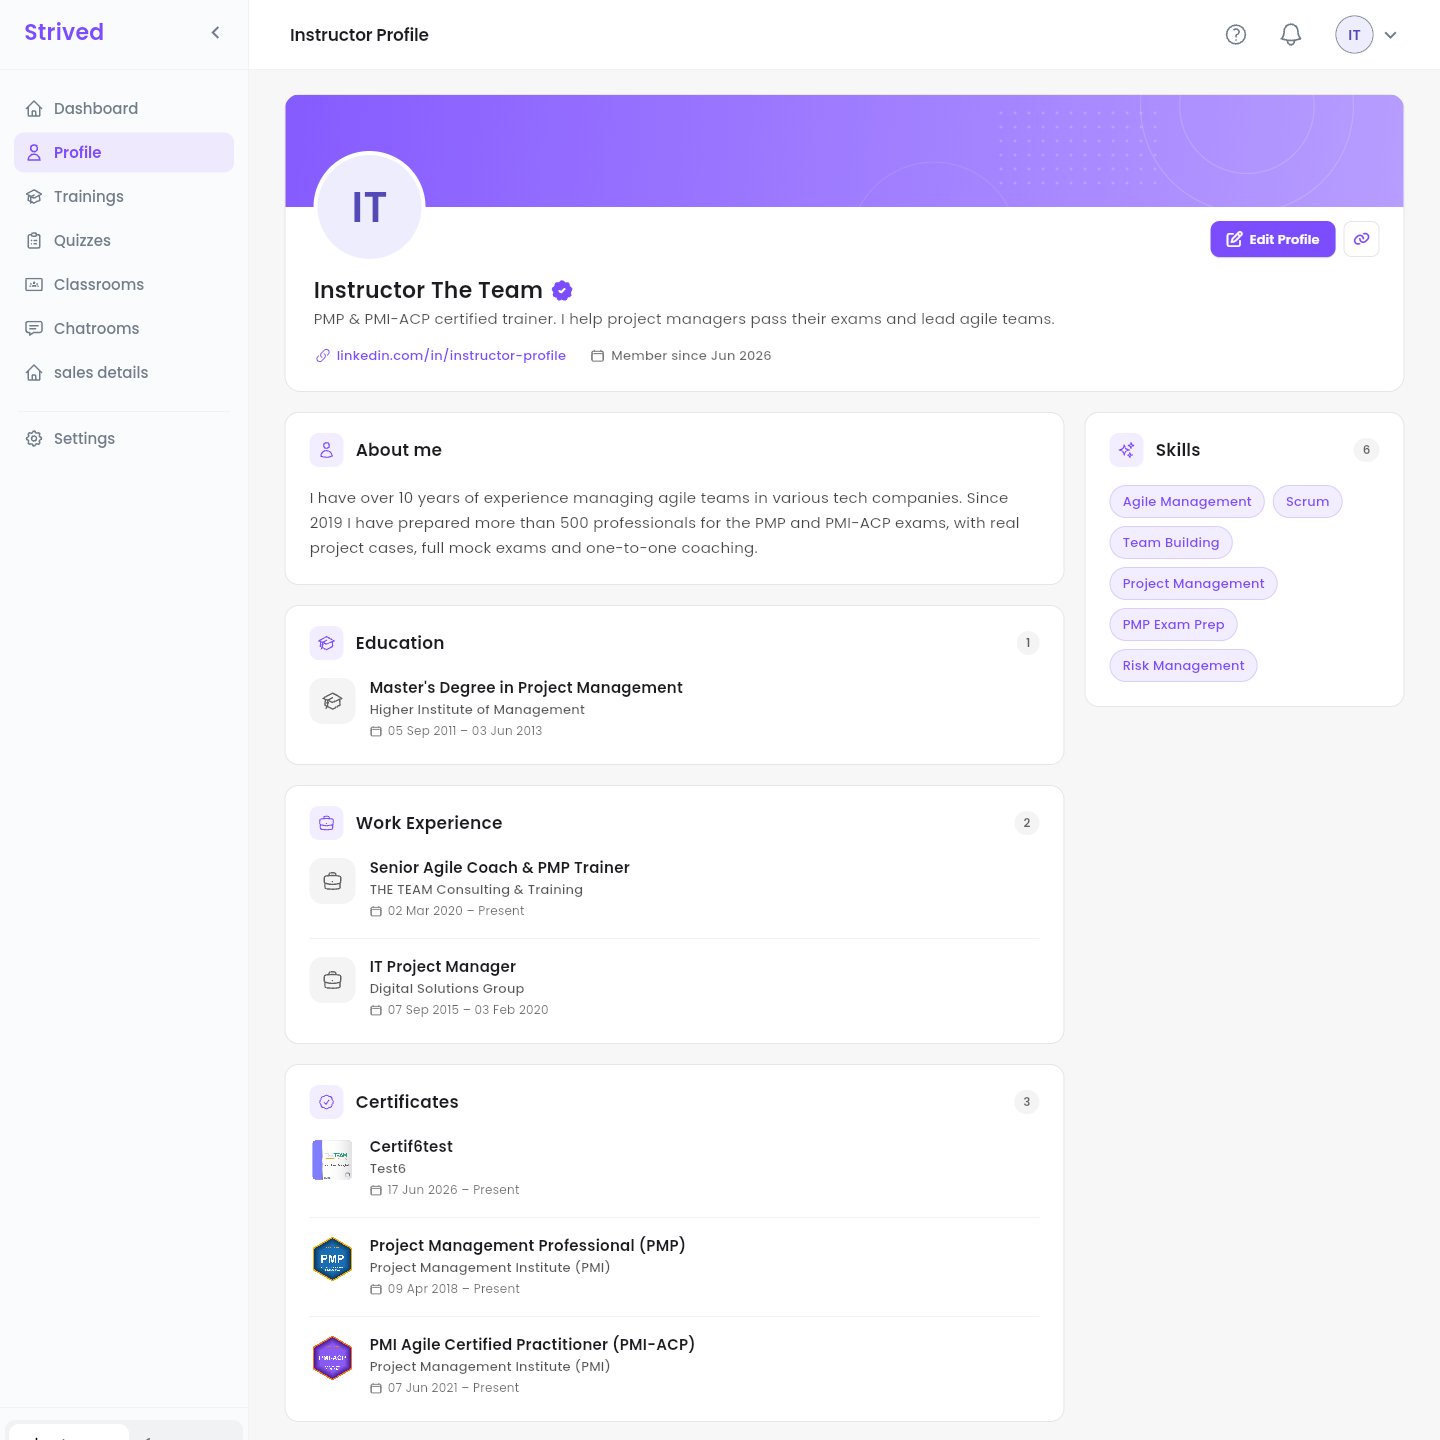
Your public profile.
Click Edit Profile at the top right to change any of it.
Step 2 — Edit your details, bio and skills
Edit Public Profile has four sections on the left: Profile, Education, Work Experience and Certificates. Profile opens first.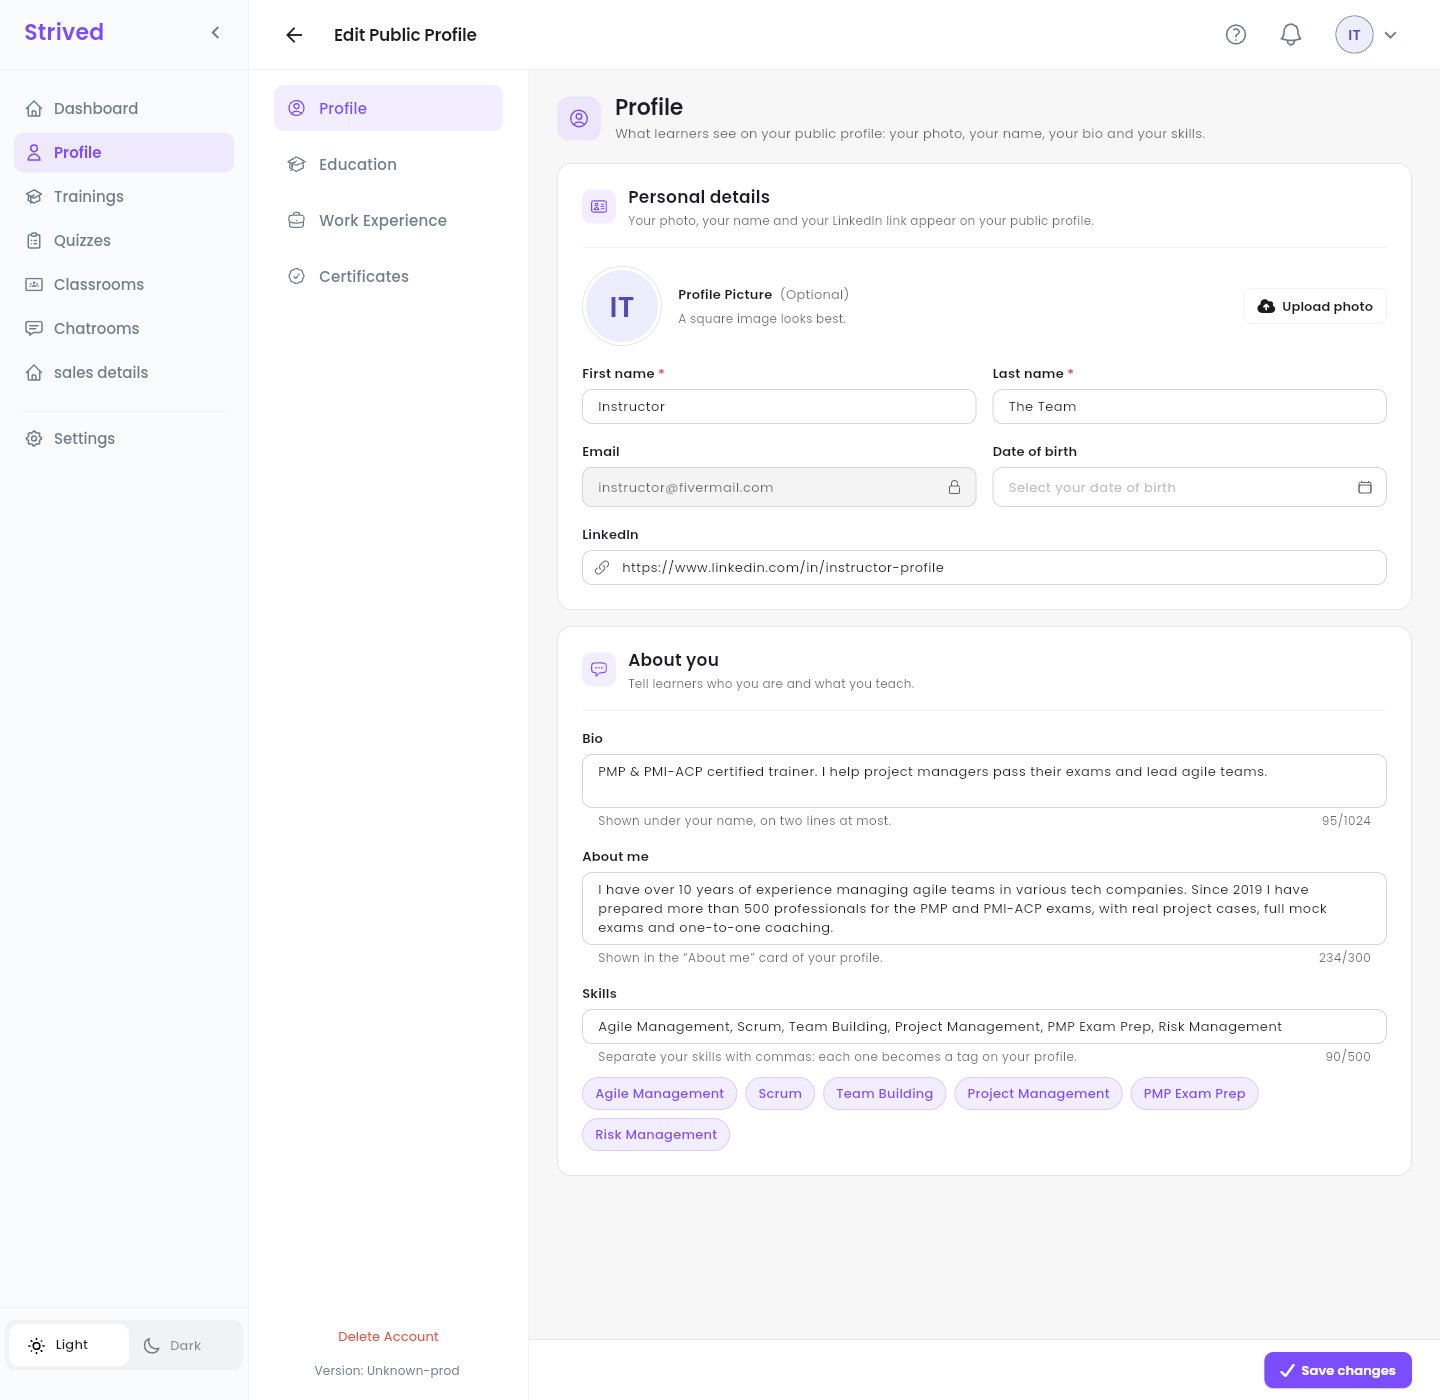
Edit Public Profile → Profile.
1
Personal details
Upload photo (a square image looks best), First name, Last name, Date of birth
and LinkedIn. The Email cannot be changed.
2
Bio
One or two lines shown under your name, e.g. “PMP & PMI-ACP certified trainer. I help project
managers pass their exams and lead agile teams.”
3
About me
A short presentation, 300 characters at most: your experience, what you teach, how you teach.
4
Skills
Separate them with commas: each one becomes a tag, and the tags appear under the field as you
type.
5
Save
Click Save changes at the bottom right. “Your profile has been updated.” confirms it.
Step 3 — Add your education and work experience
Both sections work the same way. Open Work Experience (or Education) and click Add Work Experience (or Add Education).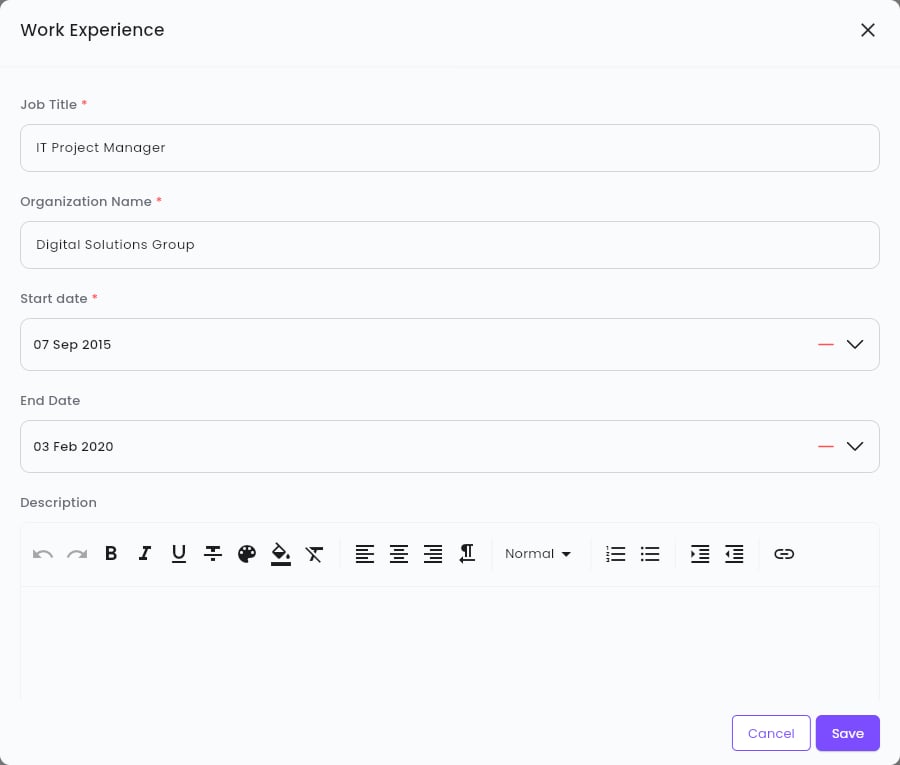
Adding a work experience.
1
What and where
For a job: Job Title and Organization Name. For a degree: Education (the degree)
and University Name.
2
When
Pick the Start date. Leave End Date empty if it is your current position: the profile
shows Present. The start date must be before the end date.
3
Description (optional)
A few lines about the role or the degree, with the formatting toolbar.
4
Save
Click Save. The entry shows on your public profile straight away.
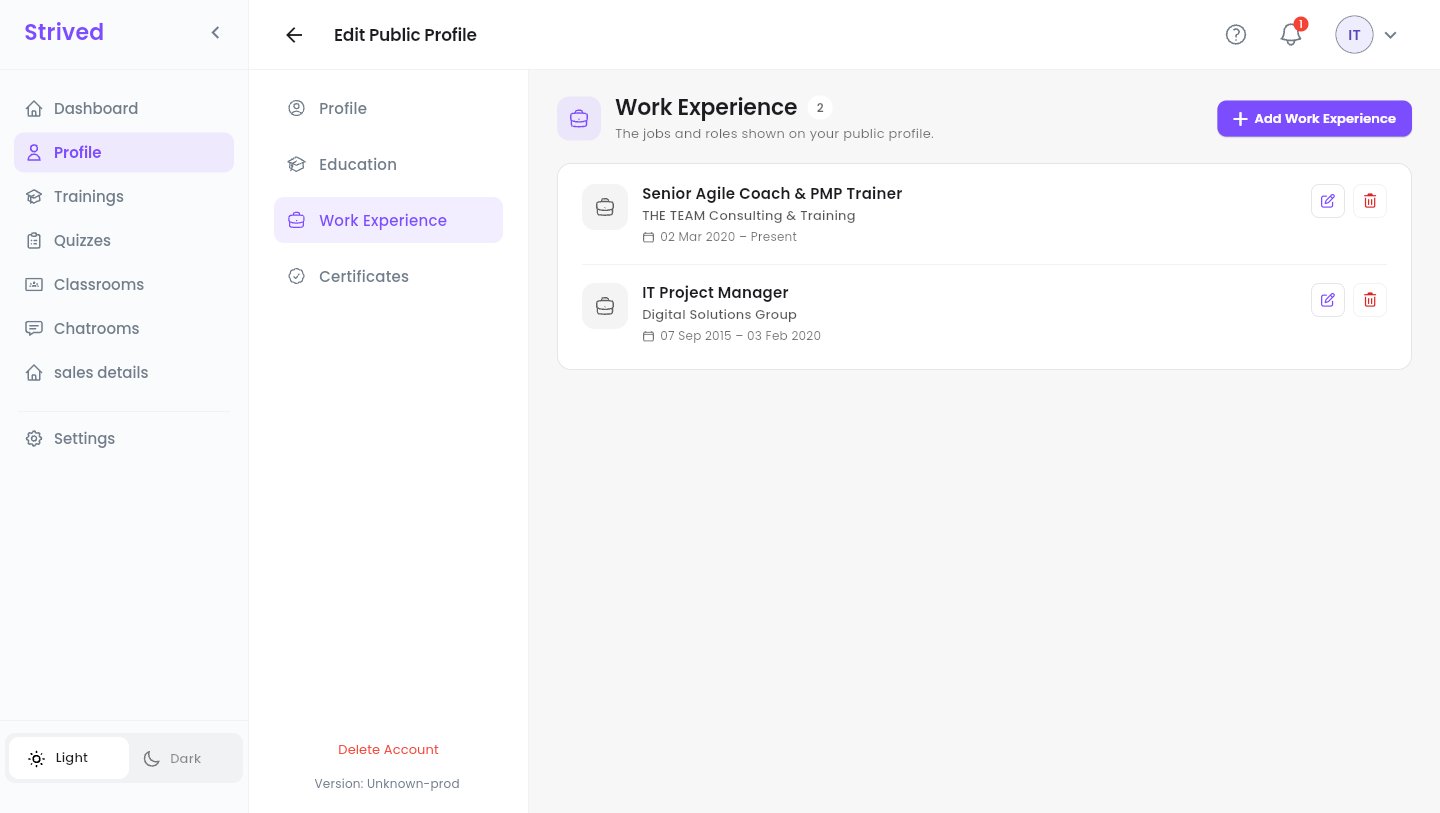
Your work experience.
Step 4 — Add your certificates and their badges
Open Certificates and click Add Certificate.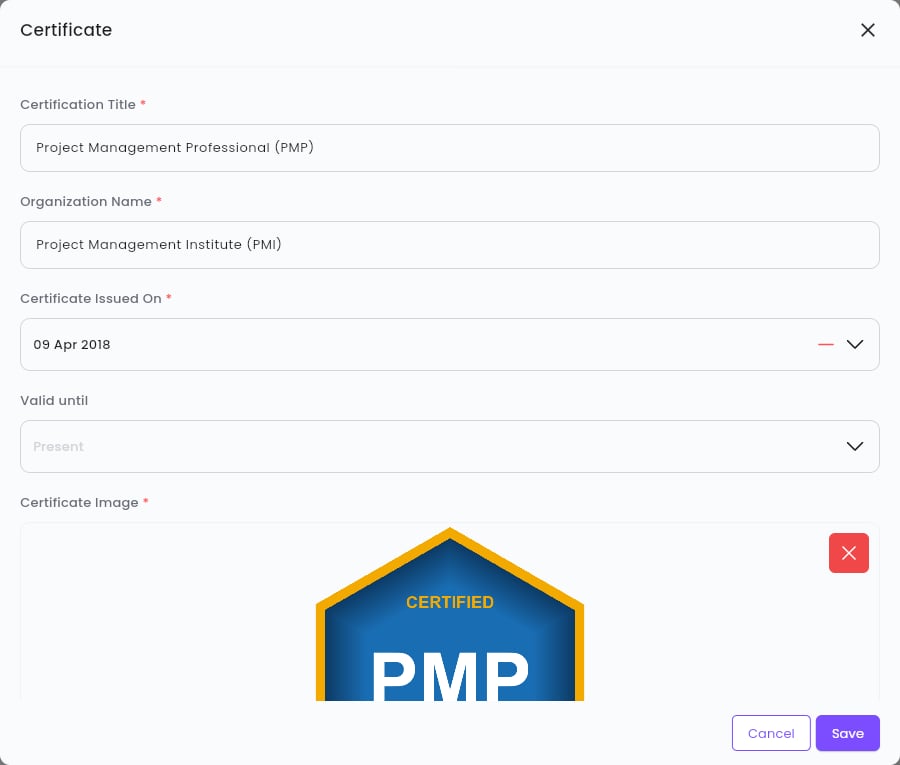
Adding a certificate with its badge.
1
The certification
Certification Title (e.g. Project Management Professional (PMP)) and Organization
Name (e.g. Project Management Institute (PMI)).
2
The dates
Certificate Issued On, and Valid until if it expires. Left empty, the profile shows
Present.
3
The badge
Under Certificate Image, click Choose File and pick the badge or a picture of the
certificate. The image is required. The red cross removes it if you picked the wrong one.
4
Save
Click Save.
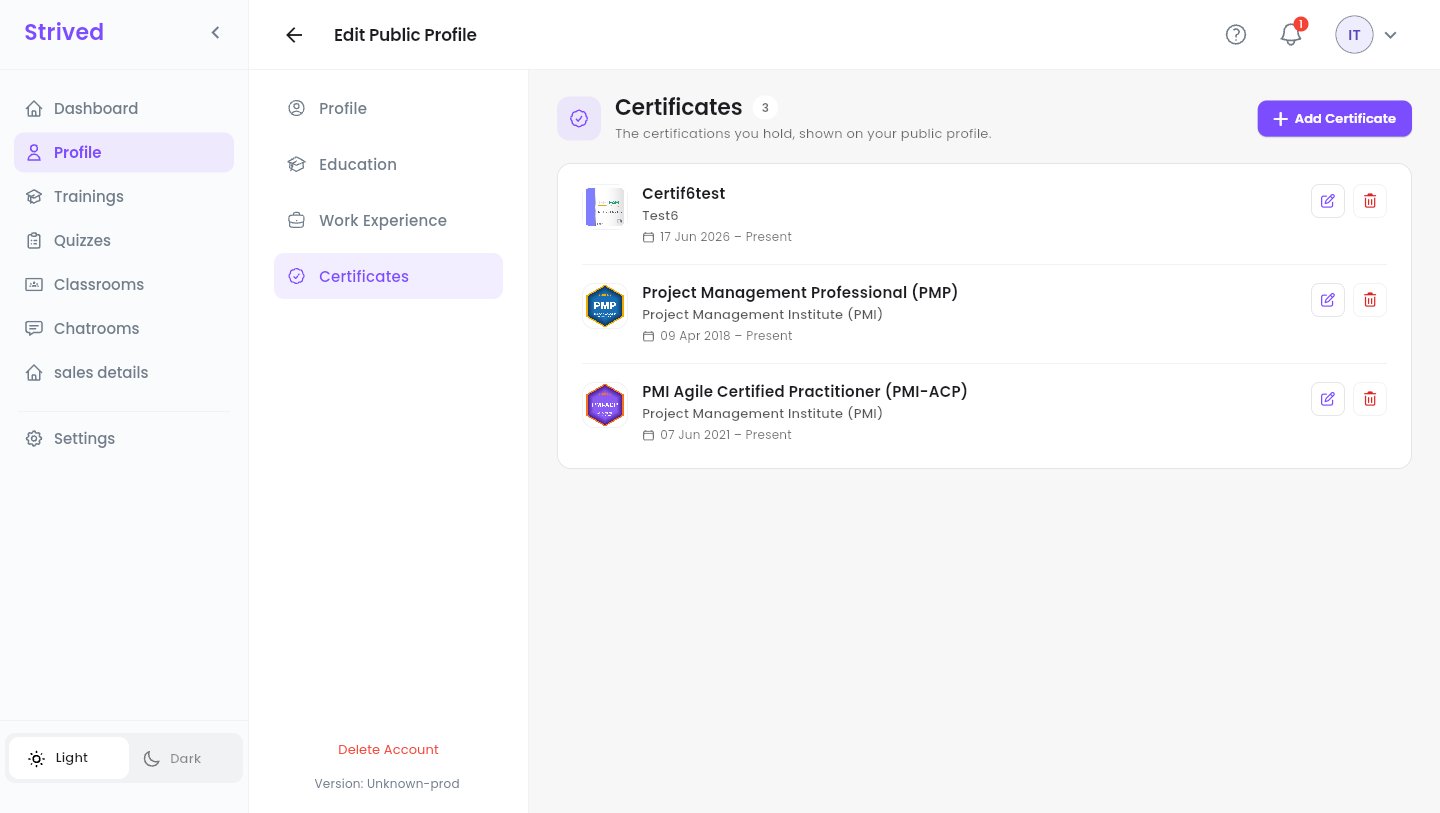
Your certificates, each with its badge.
Step 5 — Share your profile
On your profile, the link button next to Edit Profile copies your profile’s address (“The profile link was copied successfully”). Paste it in an e-mail, a post or your LinkedIn page.Good to know
What does the purple badge next to my name mean?
What does the purple badge next to my name mean?
An admin has verified your account. Only admins can verify or unverify an instructor.
Bio or About me: which goes where?
Bio or About me: which goes where?
The bio sits under your name, on two lines at most: keep it to one sentence. About me is
its own card, for a short paragraph.
Can I change my e-mail?
Can I change my e-mail?
No, it is your login. Contact the platform’s admins if it has to change.