

Everything below is for the web app on a computer, signed in as an Instructor. Learners
find their classrooms in My Content → Classrooms & Chat.
Table of contents
- Step 1 — Open your classrooms
- Step 2 — Create a classroom
- Step 3 — Preview it and notify its members
- Step 4 — Lead the chatroom
- Good to know
Step 1 — Open your classrooms
Click Classrooms in the sidebar.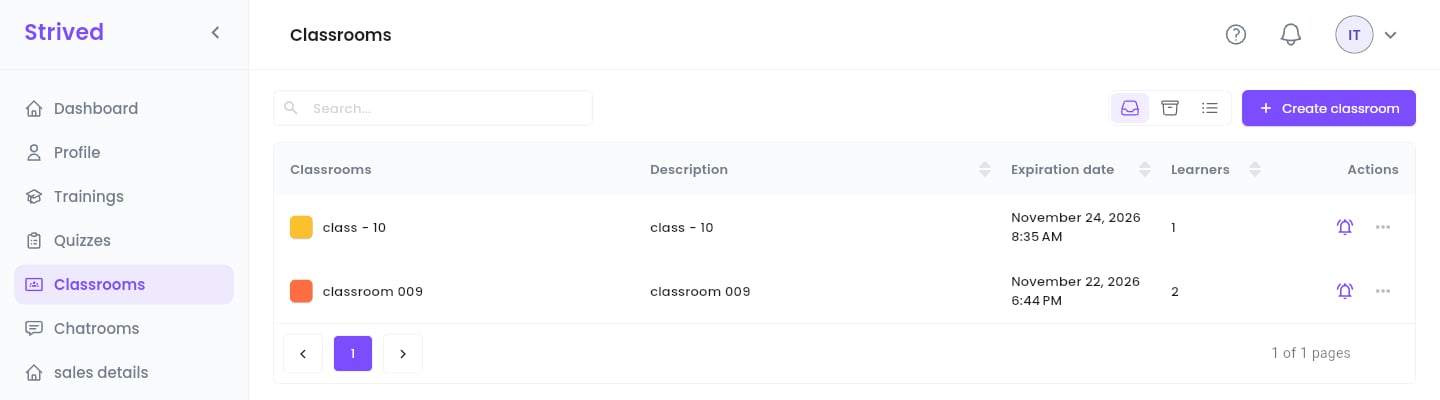
Your classrooms.
Step 2 — Create a classroom
Click Create classroom at the top right. The editor has three tabs: Basic Info, Chatroom and Content.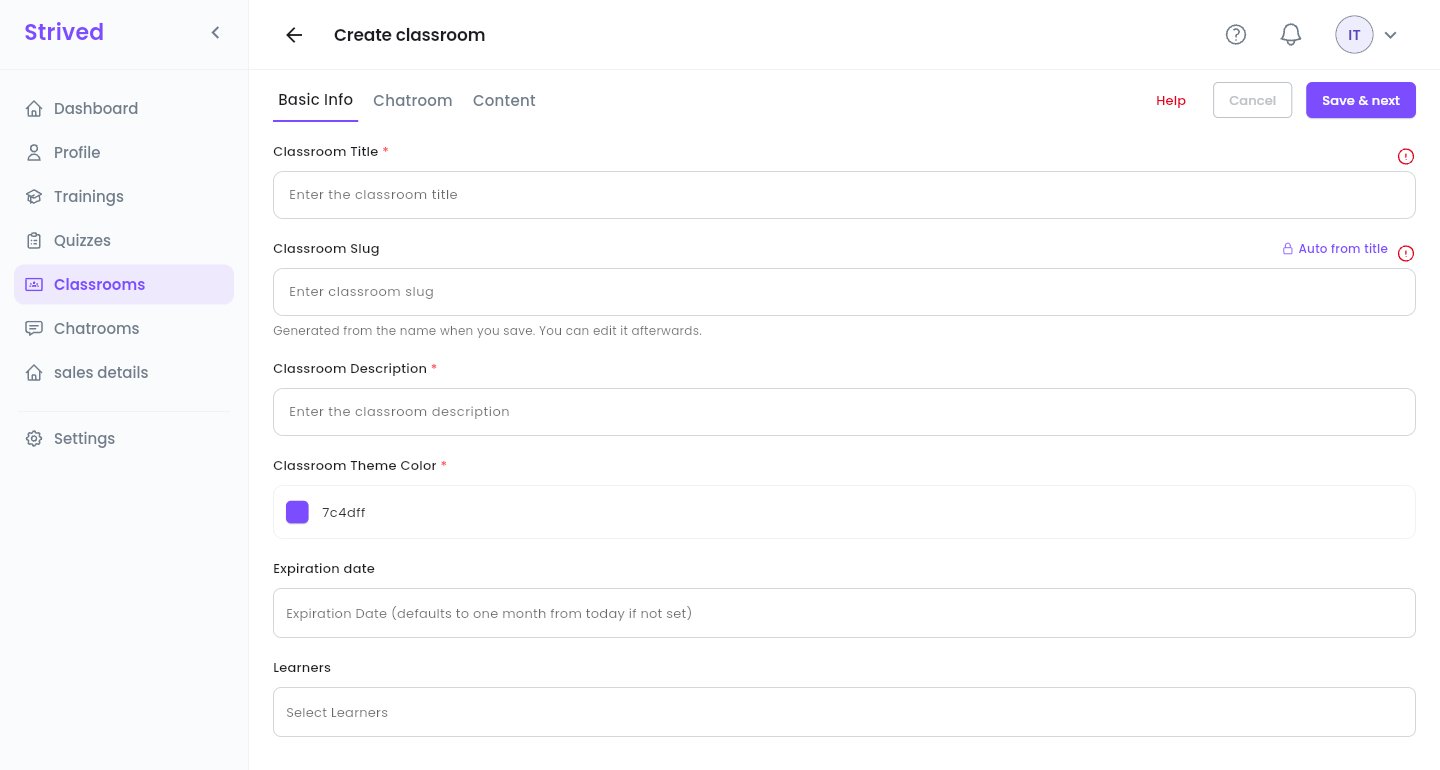
Create classroom → Basic Info.
1
Basic Info
Classroom Title, Classroom Description and Classroom Theme Color. The Classroom
Slug is generated from the title. Expiration date: left empty, one month from today.
Learners: pick everyone who takes part. You are the classroom’s instructor.
2
Save & next
Click Save & next: the classroom is created and the Chatroom tab opens.
3
Chatroom (optional)
Click Create chatroom to open the group chat now, or skip it and create it later from
Update.
4
Content
Next page opens a rich-text editor. Write what learners should find in the classroom:
schedule, instructions, resources. Click Save.
The content editor
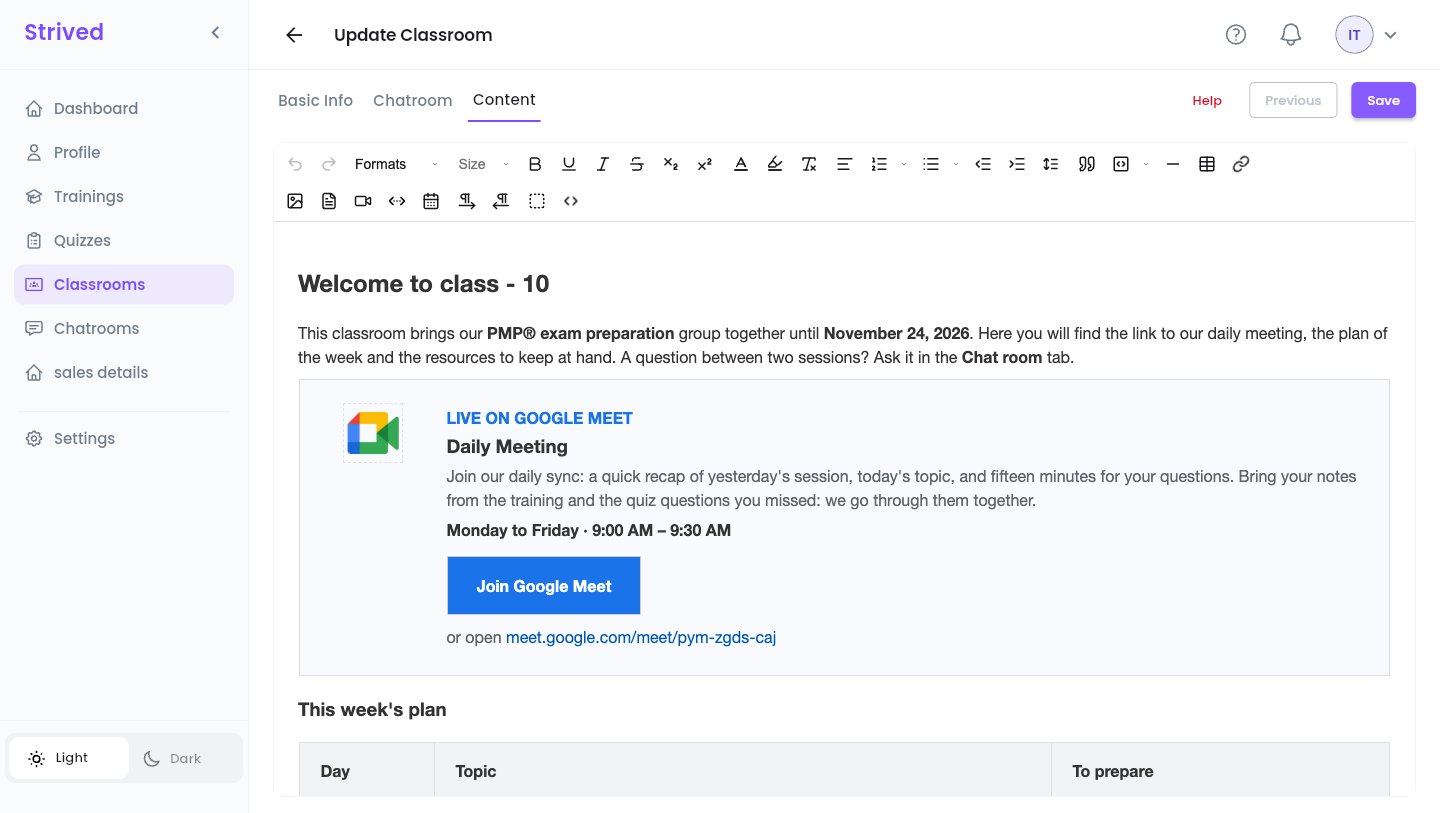
Content: the rich-text editor, here with the page of class - 10.
Reuse the Google Meet card
Reuse the Google Meet card
Open the code view (
<>), paste the HTML below where the card should go, and change the link (it
appears twice), the days and the times. Close the code view and click Save. Keep the
description about two lines long: on the learners’ page, a table is only as wide as its text
needs.Step 3 — Preview it and notify its members
⋯ → Preview opens the classroom as its members see it.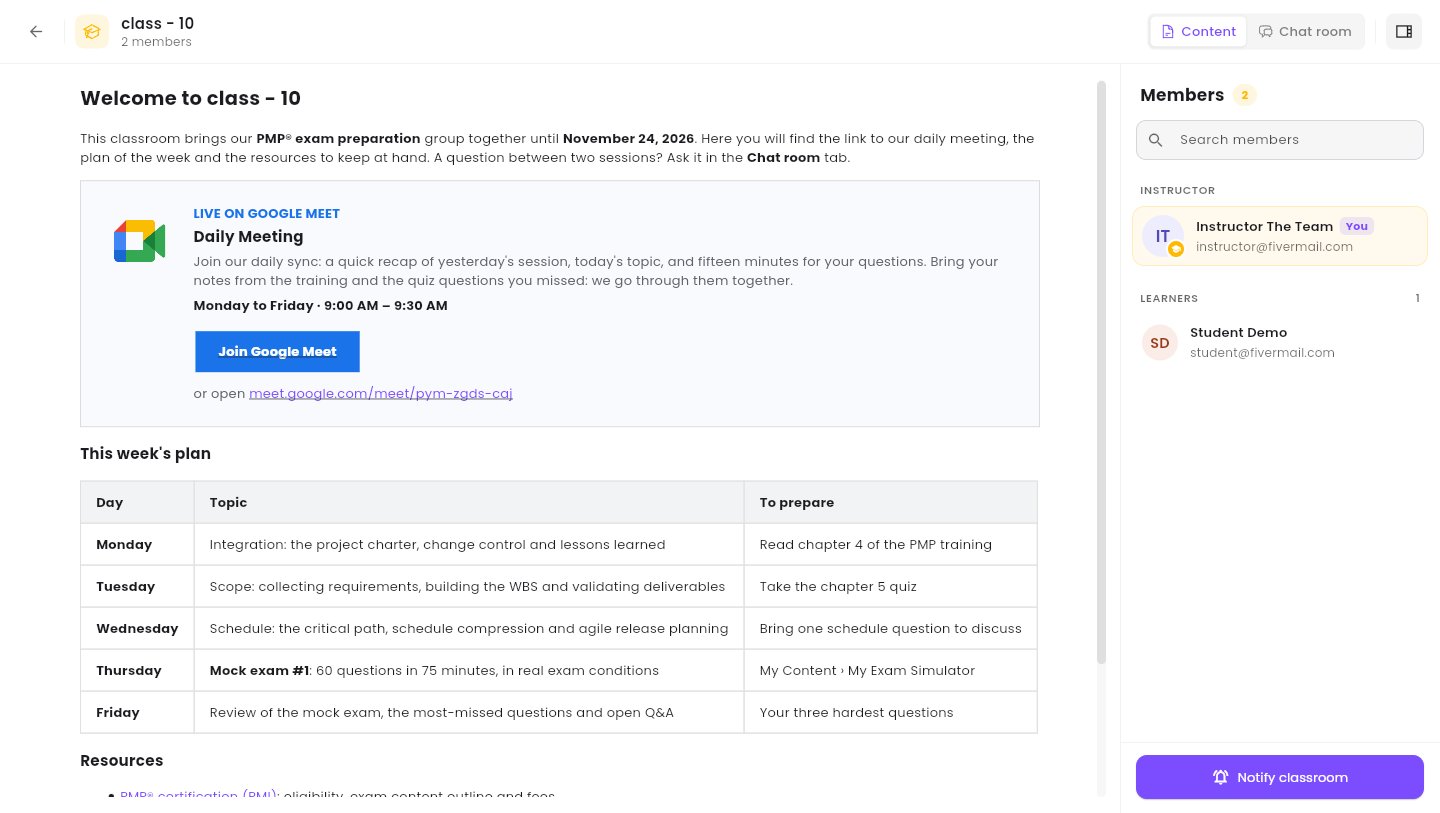
Previewing a classroom.
- Content / Chat room at the top right switch between the content page and the group chat.
- The Members panel lists you (You) and the Learners, with Search members.
- Notify classroom at the bottom sends an in-app notification to every member, like the bell in the list.
Step 4 — Lead the chatroom
Click Chatrooms in the sidebar: the chatrooms of your classrooms, as a table (List) or as a messenger (Chat).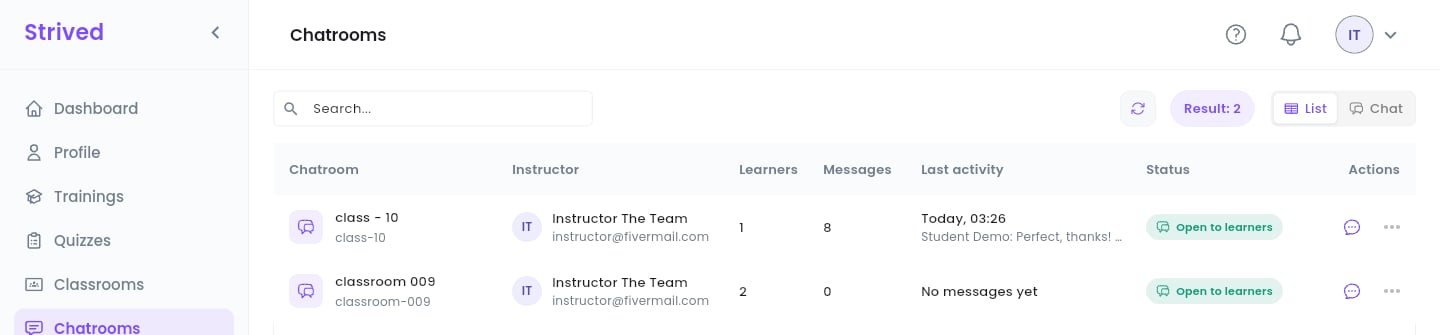
Chatrooms → List.
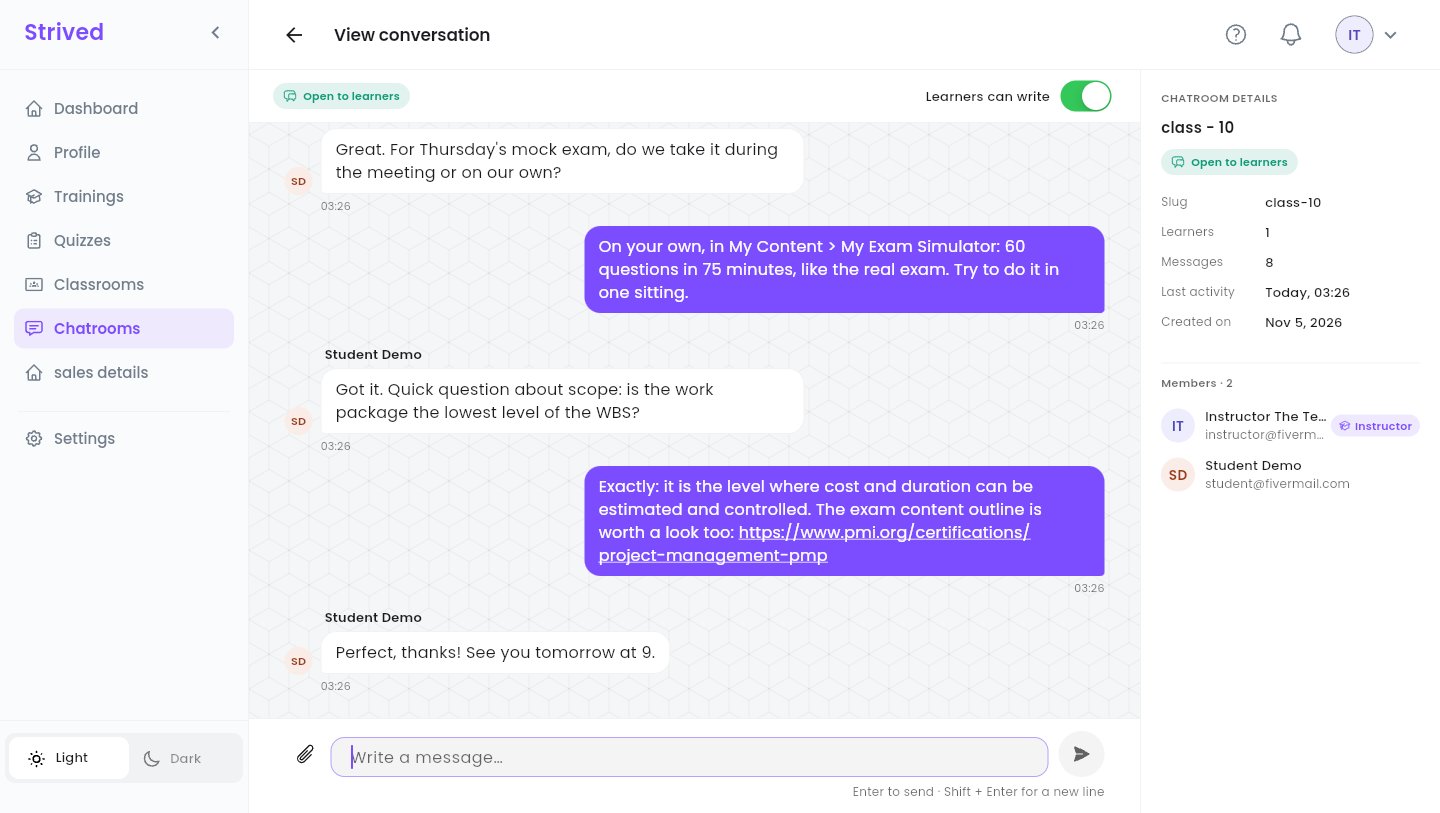
A conversation.
- Type in Write a message… and press Enter to send (Shift + Enter for a new line). The paperclip attaches images: JPG, PNG, GIF or WEBP, up to 20 MB each, 4 per message.
- Learners can write at the top: turn it off to make the chatroom read-only for learners (an announcement, an exam day…). You can still write. Turn it on again at any time.
- Chatroom details on the right: slug, number of learners and messages, last activity, creation date, and the members.
Good to know
Who can read the chatroom?
Who can read the chatroom?
You, the classroom’s learners and the platform’s admins. Nobody else can open it.
Can I delete messages or the chatroom?
Can I delete messages or the chatroom?
No, wiping the history or deleting a chatroom is reserved to admins. Contact them if needed.
I added a learner: are they in the chatroom?
I added a learner: are they in the chatroom?
Yes. Saving the classroom updates the chatroom’s members too.