

Everything below is for the web app on a computer. You will see your own certificates.
Table of contents
- Step 1 — Unlock the certificate
- Step 2 — Open the Certificates tab
- Step 3 — Preview, download or print
- Step 4 — Share it and have it verified
- Good to know
Step 1 — Unlock the certificate
A certificate unlocks once you have completed all the lessons and passed all the quizzes of a training. Follow your progress with the medal chip of the course player — see Follow a training, step 6. Once everything is done, the training’s card in My Trainings shows View certificate.Step 2 — Open the Certificates tab
Click My Content, then the Certificates tab (address/student-my-content/certifications).
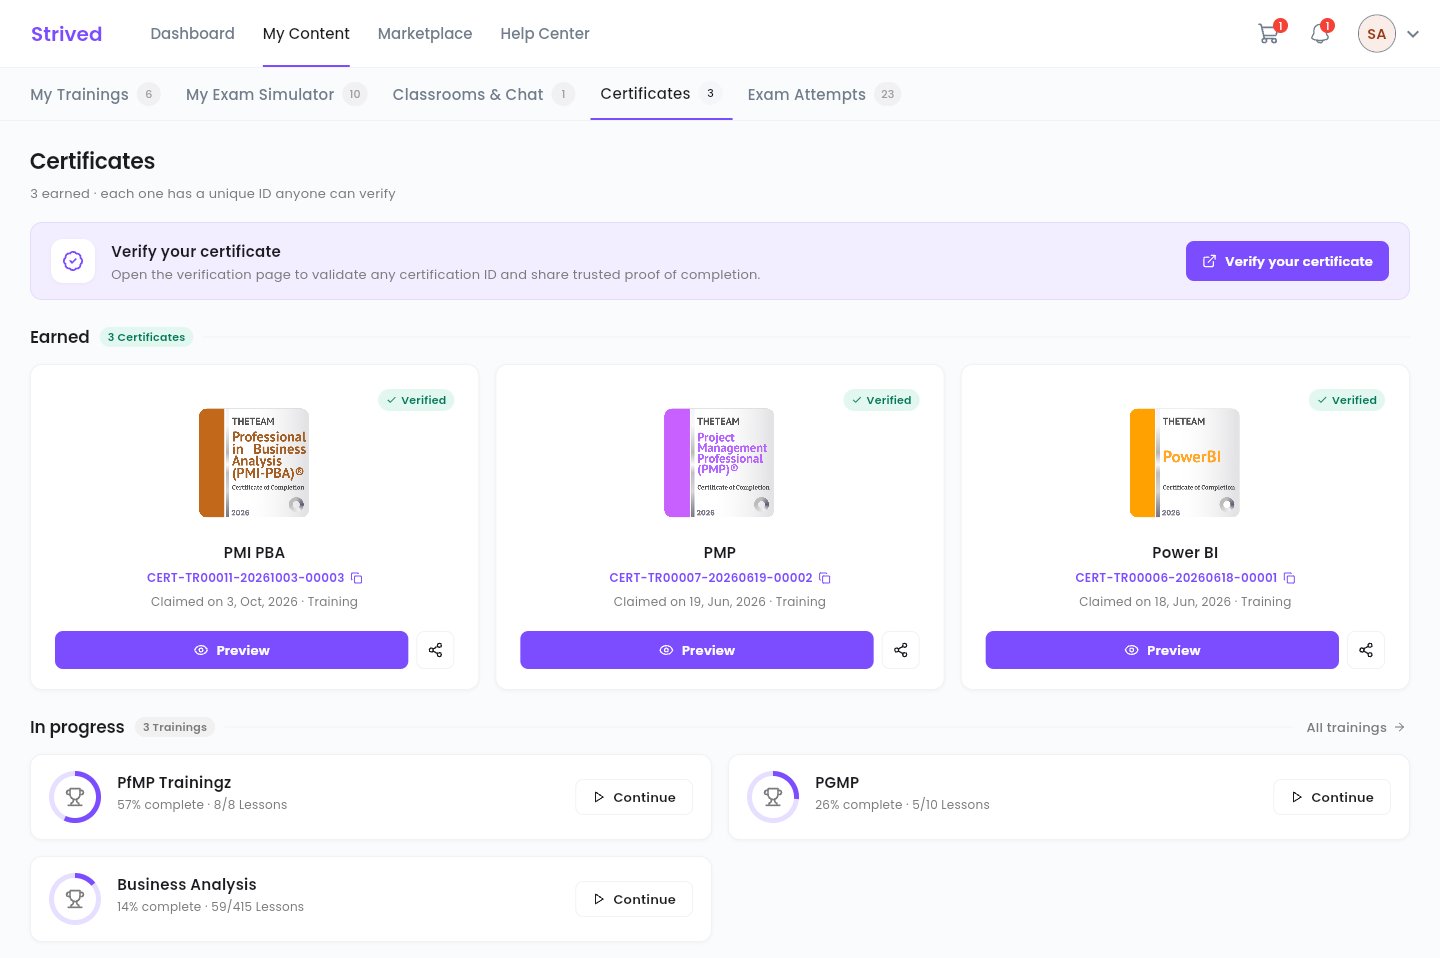
My Content → Certificates: the certificates you have earned and your trainings in progress.
Step 3 — Preview, download or print
Click Preview. The certificate page opens in a new tab, with its details (name, training, duration, date, ID) and four buttons:Step 4 — Share it and have it verified
- Share: click the share icon on a card. The certificate’s public link is copied; paste it into an e-mail or a message. Anyone who opens it sees the certificate.
- Have it verified: the Verify your certificate button opens the verification page. An
employer can enter the
CERT-…ID there to confirm the certificate is genuine.
Good to know
I completed every lesson, but there is no certificate
I completed every lesson, but there is no certificate
Check the quizzes: the certificate also needs all the quizzes of the training to be
passed. The certificate progress window, in the course player, shows what you still have to
do.
My name is misspelled on the certificate
My name is misspelled on the certificate
The certificate uses the first name and last name of your profile
(see Manage your account). To correct a certificate that
has already been issued, contact support from the Help Center.